Because A Friday Treat is the Perfect Way to End the Week!

Friday, 10 August 2012

My Version of Custard Creams.


If there was one thing in the world that I would eat all day, every day, it’s custard. I’m not fussy about where it comes from or which form it’s in either, I’ll eat fresh, tinned, powdered, custard in donuts or pastries...the list is never ending! I don’t obviously actually live on custard, in fact I haven’t had any for ages but this week I decided it was time to introduce it to Treat Friday and I have done so in the form of my favourite biscuits, custard creams.


This week I’ve had a bit of a nightmare planning what to make as I’m once again moving house. On Wednesday we made the trip up to the new house with a car full of my stuff (there’s still loads to pack...how do I have so much rubbish?) including a lot of my baking trays, utensils and recipe books, which meant that when we came back and I then had to bake yesterday, I basically had a wooden spoon, a bowl and a baking tray with which to do it. Biscuits were all I could do then really, not that I’m complaining as they are delicious, but I even came into trouble with them when I went to roll out my dough and realised I’d moved my rolling pin. Nightmare.


So yes, it is going to be great when I get moved as I finally get to say goodbye to the miniscule kitchen I’ve been sharing with two other people for the past 5 months. Moving my stuff in on Wednesday I got unnecessarily excited that I had about eight cupboards to store things in, as opposed to the one I’ve got at the moment! Yes, so I’ve still got to share the kitchen with my boyfriend but I’m really not concerned about him wanting to spend any time in there...he’s not the most talented when it comes to cooking!


In a way then, this week’s recipe is perfect for anyone who’s just starting out with baking and doesn’t yet have all the baking tins and equipment, limited as I was with what I had to bake with. All you need, as I said, is a bowl, a spoon and a baking tray. So have a go, there’s no excuse not to!


Some final tips before you get started:
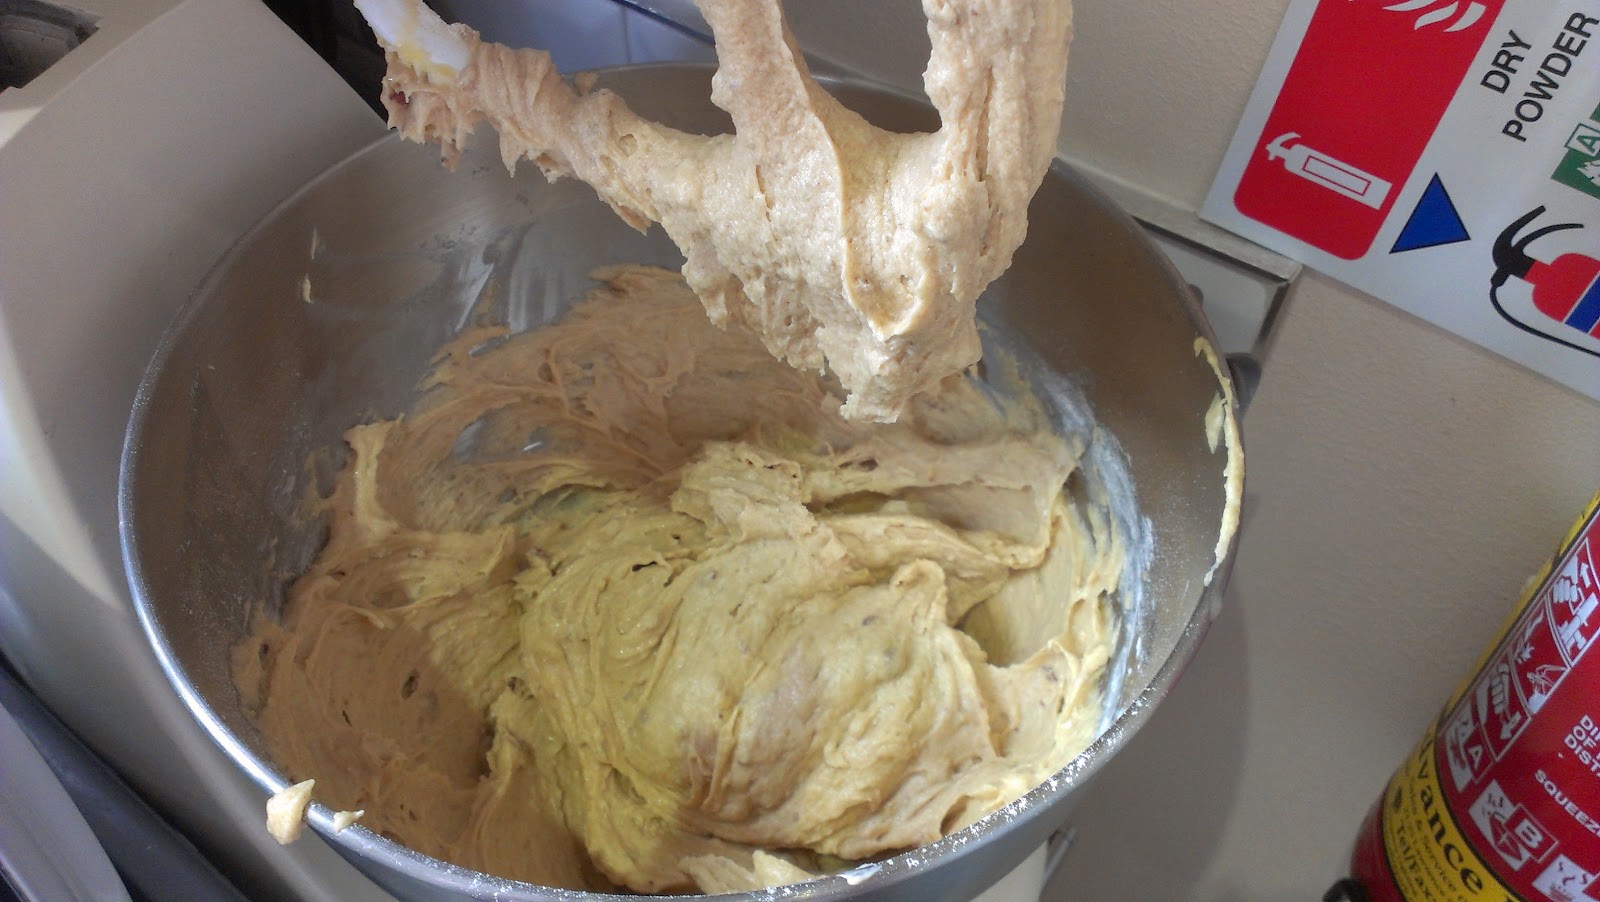
  •  When creaming together the butter and sugars, do so for at least 5 minutes. At this stage it’s impossible to over beat the mixture and makes sure that the resulting mixture is smooth and creamy.
·         As I didn’t have a rolling pin, I instead rolled my dough into small, walnut sized balls and then squashed them down on the baking tray with the back of a fork...at lot less fuss than rolling it out and cutting shapes, although you can do this if you prefer!

My Version of Custard Creams
Ingredients
175g Unsalted Butter (softened)
50g Icing Sugar (sifted)
50g Golden Caster Sugar
2 Egg Yolks
2tsp Vanilla Extract
300g Plain Flour

For the Frosting
110g Unsalted Butter (softened)
150g Icing Sugar (sifted)
2tbsp. Custard Powder

1)      Preheat the oven to 200◦C, line a baking sheet with greaseproof paper. In a large bowl, cream together the butter and both sugars until light, fluffy and creamy. Add both egg yolks and the vanilla extract and mix well.
2)      Add half of the plain flour and combine before add the remaining half. Roll up small, walnut sized balls of the dough and place on the prepared baking sheet. Push down with the back of a fork until slightly flattened.  Bake for 10 minutes or until slightly golden brown.
3)      Once the biscuits have cooled completely, make the frosting by creaming the unsalted butter with the sifted icing sugar and custard powder. Once smooth, place a teaspoon of the frosting on the flat side of one biscuit and sandwich together with the flat side of another. Repeat until all the biscuits are frosted and sandwiched and enjoy!


Friday, 27 July 2012

My Version of Chocolate Cake


Chocolate cake. Need I say more? Well probably, seeing as this is supposed to be a blog and all but I thought I’d start with chocolate cake just to draw you in. After all, it’s been a few weeks since I’ve made anything for the chocolate lovers out there! Don’t you worry, there are no nuts or fruit in sight, just pure, unadulterated chocolate!


Well...if I’m honest, the intention this week was actually to make a treacle tart but then I realised that I have yet to acquire a blender to create breadcrumbs and couldn’t quite bring myself to buy the pre-made ones...they look horrid! Also, my little sister suggested treacle tart as a Treat Friday idea and then said that she’d be really angry if I made one and she didn’t get to try any...and seeing as I live 100 or so miles from her I thought I’d better wait until our next visit rather than face her wrath.


Now, I know that chocolate cake isn’t exactly anything ground breaking but there is a reason why it’s such a common and popular cake – pure deliciousness. Furthermore while some may argue that a chocolate cake is a chocolate cake, there are so many different things you can do with it; chocolate slab cake, marble cake, chocolate orange, layer cake, dark chocolate, white chocolate, milk chocolate...you get my point!


I’ve decided however just to stick to a plain chocolate cake, partly because it’s the kind of recipe I like making this for this blog. There are hundreds of thousand of different chocolate recipes out there in the world but which one to choose? Well I’ve had a look at and compared a lot of them in order to write this recipe and have tried to put the best of them together. The result was a dense, rich and moist sponge so I think I’ve been successful!


Of course today is a pretty special day here in the UK with the Olympic opening ceremony this evening. Unfortunately I’ll be working so I’ll miss watching it on TV but I suggest there’s no better way to enjoy watching all those super fit, athletic types than from the sofa with a slice of chocolate cake in your hand. Yum!


Some final tips before you get started:

  • While I know when baking with plain chocolate you’re often advised to use a chocolate with a high cocoa content. For this recipe however it’s best to use a standard dark chocolate with a low cocoa content. Something like Cadbury’s Bourneville or similar is best.


Chocolate Cake
Ingredients
175g Unsalted Butter
225 Dark Chocolate (Broken into Small Pieces)
225g Light Soft Brown Sugar
100ml Sour Cream
2 Eggs
225g Plain Flour
5 tbsp. Cocoa Powder

For the Icing
100g Plain Chocolate
170g Condensed Milk
100g Unsalted Butter

22cmx22cm Square Cake Tin.

1)      Preheat the oven to 160◦C, grease and line the cake tin. Place the butter, sugar and chocolate into a large saucepan and place over a low heat until melted and combined.
2)      Remove from the heat for 2 minutes before adding the sour cream and mix well. Gradually add the eggs, stirring well after each addition.
3)      Into this mixture, sift the flour and cocoa powder and mix until a smooth mixture is formed. Pour into the prepared baking tin and bake for 50-55mins.
4)      While the cake is baking, place the chocolate, condensed milk and butter for the icing into a large heatproof bowl. Place over a pan of simmering water and melt until a thick, well combined mixture is formed. Leave to cool and set, stirring occasionally.
5)      Once the cake is cooked, cool completely before spreading the icing over the top. Slice into squares or bars and enjoy!


Friday, 13 July 2012

Coffee Pecan Cake


Apologies for the lack of new recipes, the past couple of weeks have been pretty annoying largely to do with the fact that my car died on the way to get ingredients one day. Luckily it happened right outside my house so at least I wasn’t stranded anywhere! It did however mean that I was unable to make it to the supermarket and therefore no new recipes were created. Since then it’s all been about house hunting again for me. Today we went and looked around 7 houses, 5 of which were awful...barely suitable for human habitation in my opinion! We found a couple of possibilities though so that was something.


This week anyway I’m back to baking ways, bringing into your lives a coffee pecan cake. I know it’s traditionally walnuts that get involved with coffee cake but I had a bag of pecans in the cupboard and decided they could be experimented with. It all worked out deliciously!


I’ve also made a bit of a weird topping for me. Although a lot of coffee cake recipes use a butter cream, I wanted something a bit smoother and firmer like those little coffee biscuits that I can’t remember the name of now. Helpful!


Anyway, a new cake from me for you to treat yourselves with this Friday. It went down very well at work in that it disappeared with about 5 minutes, no exaggeration, so I hope you enjoy it too!


Some final tips before you get started:
  • To crush my pecans I put them into a small sandwich bag and smashed them with a rolling pin – much more therapeutic than putting them in a blender!
  • This frosting, as I’ve already said, is not like the usual buttercreams I make. The inclusion of syrup helps it to set a lot faster than usual and therefore I don’t suggest you beat this for very long at all. It literally just needs beating until smooth and well combined and then immediately spread onto your cake.
  • If your frosting does get a little stiff before you can spread it, simply run your spreading or palette knife under hot water before spreading and it should go on easily.


Coffee Pecan Cake
225g Unsalted Butter (softened)
225g Caster Sugar
2tsp. Instant Coffee in 1tbsp. Boiling Water (cooled)
225g Plain Flour
2 ½ tsp. Baking Powder
½ tsp. Bicarbonate of Soda
4 Eggs
1 tbsp. Milk
50g Pecans (crushed)

Frosting
50g Unsalted Butter
1tbsp. Golden Syrup
300g Icing Sugar
2tbsp. Strong Coffee
Pecans (to decorate)

1)      Preheat the oven to 180◦C, grease and line two 20cm cake tins. Cream together the butter and sugar until light and fluffy. Stir in the coffee until smooth.
2)      In a separate bowl, sift together the flour, baking powder, bicarbonate of soda and add the crushed pecans. In a further bowl, lightly whisk your eggs together with the milk. Add a small amount of the eggs to the creamed butter and sugar and mix well. Add a little of the flour mixture and again stir to combine. Continue doing this, alternating between the two until all ingredients are incorporated. 
3)      Divide the mixture evenly between the two tins and bake in the preheated oven for 25-30mins or until a skewer inserted into the middle of the cakes comes out clean. Once cooked, leave to cool completely.
4)      To make the frosting, in a small saucepan melt together the butter and golden syrup over a low heat. Sift the icing sugar into a large mixing bowl before adding the melted butter and syrup as well as the coffee. Mix until smooth and well combined.
5)      Spread half of the frosting on top of one cake before sandwiching together with the other cake. Spread the remaining frosting evenly over the top. Finally, decorate with the pecan halves. 


Friday, 22 June 2012

Cherry Crumble Cake


In my house, a secret war is ongoing. It’s a war that is potentially the most passive aggressive in history and one that I am currently losing. It’s the war of the fridge space.

Now when I moved in March, I had the whole house to myself for a month, but did I hog all the space in the fridge and elsewhere? No, I was good and nice and left plenty of space because I knew a couple of other people would be moving in soon. So then my housemates moved in and not only did they fill every single space left in the entire house, they also started muscling in on the equal portion of space that I was occupying – how rude! Literally, now it’s at the point that if I run out of something that lives in the fridge, I have to replace it immediately or else it gets filled with something stupid like a wine bottle full of water (???). Its super frustrating and is basically taking over my life in terms of things I’m annoyed about. Anyway, rant over! I’m just telling myself that I’ve only got a month and a half left in this house and then I’m free!! 


So onto this week’s recipe, cherry crumble cake! I know last week I said it would be cherry and dark chocolate but I decided while writing it this week that I’d maybe overused chocolate over the past few weeks – you can have too much of a good thing! So it’s just cherries and cake and crumble – delicious.


I’ve made a cake which was similar to this in the past but that recipe used blueberries and pecans. It was a great recipe and really delicious so it inspired me quite a lot with this cake. I’ve made a few adaptations – I’ve used a different crumble recipe for the topping, cherries and almonds rather than pecans and changed a few of the quantities – and it all works. It’s another great everyday tea cake, with the crumble topping just making it that tiny bit more special.


Some final tips before you get started: 
  • I used tinned, pitted cherries for this recipe. Usually when I bake with cherries I use frozen ones, however yesterday I couldn’t find any in the shops so I had a go with tinned. They worked fine so I would say go with your preference – fresh, frozen or tinned. Obviously fresh are better but they also cost a fortune and you have to get the pips of them – I’m too lazy for this!
  • To prepare your loaf tin, I suggest greasing and flouring the tin as well as placing a long strip of greaseproof paper along the base, with overhangs at each end so the cake can be easily lifted out. 
Cherry Crumble Cake
Ingredients
For the Crumble Topping:
60g Plain Flour
25g Unsalted Butter  (chilled)
25g Caster Sugar
¼ tsp. Ground Cinnamon
20g Sliced Almonds

For the Cake:
190g Unsalted Butter (softened)
190g Caster Sugar
3 Eggs
200g Plain Flour
1tsp. Baking Powder
¼ tsp. Salt
½ tsp. Cinnamon
30ml Whole Milk
200g Pitted Cherries (roughly chopped)

1)      Preheat the oven to 170◦C, grease, flour and line your loaf tin. Begin by making your crumble. In a small bowl, rub together the butter and flour until the mixture resembles fine breadcrumbs. Stir in the caster sugar, ground cinnamon and sliced almonds. Place to one side.
2)      In a large bowl or freestanding mixer, cream together the butter and sugar until light and fluffy. Gradually, a little at a time, add the eggs to the creamed butter and sugar mixing well after each addition.
3)      In a separate bowl, sift together the flour, baking powder, salt and cinnamon. Gradually add this dry mix to the wet mixture in three stages, stirring well each time. After the second addition, add the milk and combine. Once the mixture is completely smooth, add half of the chopped cherries and stir to evenly distribute throughout. Pour into your prepared loaf tin and add the remaining cherries to the top of the mixture. Top these cherries with the crumble mixture and lightly press down with the back of a spoon. Bake in a preheated oven for 60mins or until a skewer inserted into the middle of the cake comes out clean.
4)      Leave to cool completely in the tin before removing and cutting into slices. Enjoy!


Friday, 15 June 2012

My Version of Rocky Road


I’ll admit, this week I haven’t been particularly original or exciting but I have been fun – what’s more fun than grabbing a load of confectionary and snacks, smothering them in chocolate and squishing them into bars of rocky road? I can tell you – not much. Although it’s not something that necessarily requires a recipe and most people probably have their own version, but here’s mine and it’s pretty delicious and Treat Friday worthy...in my opinion anyway!


This week has been fairly boring for me with this being my first day off work since last week’s Treat Friday. Adding to that I’ve spent the week attempting to be super healthy in order to try and detoxify my body from all the cake and trifle I had during the birthday celebrations last week. Now I’m heading away for the weekend though and I’ll probably eat and drink rubbish again and have to start the process all over again next week...fine!


Now onto the Rocky Road, I have to admit that it’s not something that I particularly have a great love for. I don’t dislike it, don’t get me wrong, but it’s not something I’d necessarily choose given a choice of cakes or bars. I’ve made it a couple of times though, the first time being by request for my younger sister when she finished her exams several years ago. This particular time, I followed a recipe from one of my favourite cook books and...it was a monster. Literally, this stuff had 2kg of chocolate in the recipe and that was just the tip of the iceberg. It was huge and sickly and of such scale that it looked like you could probably build a house with the brick sized portions. Anyway, lesson learned – any recipe that uses more confectionary than you’d otherwise eat in a year, should be generally avoided.


Consider my version the scaled-down, no industrial but still delicious version. Of course, feel free to substitute the additions I’ve made with your preferences but I’d suggest sticking with similar quantities.


No tips this week – look out next week for my dark chocolate and sour cherry loaf cake!

Rocky Road
Ingredients
200g Milk Chocolate (broken into small chunks)
200g Dark Chocolate (broken into small chunks)
1 tbsp. Golden Syrup
75g Mini Marshmallows
75g Digestive Biscuits (broken up)
75g Honeycomb
50g Salted Peanuts
200g White Chocolate (broken into small chunks)

9inch Square Cake Pan

1)      Line the cake pan with tin foil and lightly grease with butter. Melt together the golden syrup, milk and dark chocolate in a heatproof bowl over a saucepan of boiling water.
2)      While the chocolate and syrup is melting, combine the marshmallows, biscuits, honeycomb and salted peanuts together in a large bowl. When the chocolate and syrup are fully melted, pour over the dry ingredients and stir until evenly combined.
3)      Tip this into the prepared pan and press down until fairly even. Again in a heatproof bowl over a saucepan of boiling water, melt the white chocolate. Pour this melted white chocolate over the top of the rocky road. Leave or chill until fully set before slicing into bars.


Thursday, 7 June 2012

Cranberry and White Chocolate Cookies


Well, it’s been another busy and fun filled week in my life, made even better by the fact that it was my birthday on Wednesday! All very exciting, for obvious reasons, but made even more so by travelling home to my parents’ house to spend it there. It was only the second time I’ve visited since March so it was really fun to see all the family and finally get some baked goods that I didn’t bake myself! I broke with tradition this year and requested my sisters make me a birthday trifle rather than cake. I did this largely because I have cake reasonably frequently doing this blog and because I ultimately love trifle! And this wasn’t just some ordinary trifle, it was a raspberry and white chocolate trifle....three words; white chocolate custard. Yum. So that was delicious and I ate close to my own weight in it seeing as I think that’s what you’re supposed to do on your own birthday.


Now though I’m back home and back in the kitchen with some white chocolate and cranberry cookies. If I’m honest, with all the fun and games of the past week I had a moment of...’oh yeah, it’s Friday tomorrow’ and had no idea what to make. So I started flicking through my recipe books and came across several cookie recipes and a white chocolate and cranberry cookie recipe in particular. Up to this point, I’ve avoided using a cookie recipe for Treat Friday largely because it’s a bit boring and most people have a favourite cookie recipe they use anyway. Well obviously I’ve given in, but I’ve tried to make it a bit more fun with some cranberries thrown in rather than just plain old chocolate. I did want to put macadamia nuts in too to make them fancier, unfortunately the supermarket didn’t have any – how uncooperative!


These cookies are very nice regardless and also very easy. The quantities in this recipe made 25 smallish cookies for me but you can make them as large as you want to! So enjoy your treat Friday, I unfortunately won’t be partaking this week due to the vast quantities of treats (trifle) I’ve already had this week. Roll on next Friday!


Some final tips before you get started:
  • To keep these cookies nice and round, briefly roll each piece of dough into a ball before you place it on your baking sheet. They’ll cook down to an (almost) perfectly round shape.
  • Make sure each piece of cookie dough is a couple of inches away from those around it. This dough will spread and if not they’ll cook together, you’ll have to cut them apart and you end up with square cookies. The horror!
  • For me, 12 minutes is the perfect baking time when making the smallish versions of these cookies. The dough balls I made were about the size of a walnut and 12 minutes in the oven left them slightly crunchy on the outside but soft and chewy on the inside. If you prefer yours softer, I’d have a go at cooking them for 10 minutes. If you like them crunchier, I’d leave them in for 15 minutes – just make sure they don’t burn!


Cranberry and White Chocolate Cookies

Ingredients
140g Unsalted Butter (softened)
80g Caster Sugar
80g Soft Light Brown Sugar
1 Egg
½ tsp. Vanilla Extract
200g Plain Flour
½ tsp. Salt
¼ tsp. Ground Cinnamon
½ tsp. Bicarbonate of Soda
100g Dried Cranberries
100g White Chocolate Chips

2 x Baking Sheets

1)      Preheat the oven to 170◦C, line the baking sheets with greaseproof paper. In a large bowl, cream together the butter and both of the sugars until light and fluffy. Gradually add the egg and the vanilla extract, stirring between each addition until well combined.
2)      Sift the plain flour, salt, ground cinnamon and bicarbonate of soda into the bowl and stir until just combined. Add the dried cranberries and white chocolate chips, stir until evenly distributed.
3)      Take heaped teaspoons of dough and roll into balls, place onto the prepared baking sheets leaving a couple of inches between each ball of dough. Bake in the preheated oven for 12-15 minutes.
4)      When slightly golden brown, remove from the oven and leave to cool on the sheets. Enjoy!


Friday, 25 May 2012

Millionaires Shortbread


Following on from last week’s Bakewell Tart, today we’re going for another classic – Millionaires Shortbread. I can honestly say that never in my entire life have I ever met a person who does not love this overly indulgent excuse for a biscuit/bar/general baked good. Therefore you cannot go wrong if you choose to spend an hour of your Friday (other days are available) having a go at this recipe. Worst case scenario, everything goes wrong and you end up scooping melted chocolate, caramel and biscuit out of a cake tin...that’s my kind of worst case scenario.


Now to begin with these delicious little chaps, one thing that has always annoyed me about them is the name. Do you go for ‘Chocolate Caramel Shortbread’ or ‘Millionaires Shortbread’? Is the latter being snobby? Is the former insinuating that you are an idiot by having to name it with every ingredient involved? Who knows? I like Millionaires Shortbread anyway...it sounds jazzier.


Regardless, this is another of those great recipes which can be so incredibly simple but with exceptional results. I’m trying to be traditional here and am therefore making all of the layers separately and from scratch (minus the chocolate obviously...) It is however, a recipe that can be as complicated or easy as you want it to be. If for example, you wanted to go for quick, fast and delicious, you could make the shortbread layer using smashed up shortbread biscuits mixed with melted butter (as you would for a cheesecake base), the caramel using the excellent pre-made stuff and sticking some melted chocolate on top to finish it off. Job done.


That, or you can make it extra special, spend a little more time and follow this recipe. As I said, in terms of audience satisfaction, you can’t go wrong with this one. That is of course, if it makes it out of your kitchen and doesn’t mysteriously disappear in the mean time...what do you mean there’s chocolate all around my mouth?


Some Final Tips Before You Get Started:
  • I’ve used dark chocolate in my recipe whereas most recipes call for milk chocolate. I’ve done this just due to my personal taste in order to try and reduce some of the sickly sweetness which comes with Millionaires Shortbread. If you’re not a fan or you like that sweetness, by all means use milk chocolate instead.
  • When making your caramel, watch it and stir it constantly or else it will burn to the pan and you’ll end up having to sieve it onto your biscuit base. I of course, have never done this...maybe.
  • We’ve gone over the best way to melt chocolate many times in the past – using a bain marie or a heatproof bowl over a saucepan of boiling water. In this recipe I did this for the large quantity of dark chocolate, however with the 50g white chocolate, I put this in a heatproof ramekin and melted this in the microwave, just for speed and because it’s easier to wash a ramekin than a bowl (laziness). You have to be careful when doing this however as the chocolate can really easily burn. I avoid this by blasting in the microwave for only 10 seconds at a time and stirring it after every 10 seconds until the chocolate is melted. It’s quick and easy but just be careful.
Millionaires Shortbread

Ingredients

For the Biscuit Layer:
200g Plain Flour
150g Unsalted Butter (softened)
60g Caster Sugar

For the Caramel:
397g Tin of Sweetened Condensed Milk
100g Light Brown Sugar
100g Unsalted Butter
2 tbsp. Golden Syrup

For the Chocolate:
250g Dark Chocolate
50g White Chocolate

9inch Square Brownie Tin

1)      Preheat the oven to 180◦C, grease the base and sides of your cake tin and line the base with greaseproof paper. In a large bowl, combine together the plain flour and caster sugar. Cut the softened butter into cubes and add to the flour and caster sugar. Using the tips of your finger against your thumbs, rub the butter into the flour and sugar. This will initially look like a breadcrumb mixture but will come together into a dough.
2)      Tip the dough into your prepared tin and press it down firmly to evenly cover the base. Bake for approximately 25 minutes or until golden brown and firm. Remove and leave to cool.
3)      While the base is cooling, place the condensed milk, light brown sugar, unsalted butter and golden syrup into a non-stick saucepan. Place over a medium heat and stir continuously for 7-8 minutes until the butter has melted and the mixture has thickened and turned a golden caramel colour. Spread evenly over your biscuit base and leave to set and cool for at least 30 minutes.
4)      For the chocolate layer, melt the down both chocolates in separate bowls using either a bain marie or the microwave (if using the microwave, be careful not to let it burn). Once melted, pour the dark chocolate over the caramel and spread evenly. Using a spoon, drizzle lines of white chocolate vertically over the dark chocolate. Finally, using either the point of a knife or a skewer, drag it across the chocolate layer in horizontal lines to get that swirling/dripping effect. Leave the chocolate to set before cutting into small squares or larger bars. Enjoy!