Because A Friday Treat is the Perfect Way to End the Week!

Friday, 22 June 2012

Cherry Crumble Cake


In my house, a secret war is ongoing. It’s a war that is potentially the most passive aggressive in history and one that I am currently losing. It’s the war of the fridge space.

Now when I moved in March, I had the whole house to myself for a month, but did I hog all the space in the fridge and elsewhere? No, I was good and nice and left plenty of space because I knew a couple of other people would be moving in soon. So then my housemates moved in and not only did they fill every single space left in the entire house, they also started muscling in on the equal portion of space that I was occupying – how rude! Literally, now it’s at the point that if I run out of something that lives in the fridge, I have to replace it immediately or else it gets filled with something stupid like a wine bottle full of water (???). Its super frustrating and is basically taking over my life in terms of things I’m annoyed about. Anyway, rant over! I’m just telling myself that I’ve only got a month and a half left in this house and then I’m free!! 


So onto this week’s recipe, cherry crumble cake! I know last week I said it would be cherry and dark chocolate but I decided while writing it this week that I’d maybe overused chocolate over the past few weeks – you can have too much of a good thing! So it’s just cherries and cake and crumble – delicious.


I’ve made a cake which was similar to this in the past but that recipe used blueberries and pecans. It was a great recipe and really delicious so it inspired me quite a lot with this cake. I’ve made a few adaptations – I’ve used a different crumble recipe for the topping, cherries and almonds rather than pecans and changed a few of the quantities – and it all works. It’s another great everyday tea cake, with the crumble topping just making it that tiny bit more special.


Some final tips before you get started: 
  • I used tinned, pitted cherries for this recipe. Usually when I bake with cherries I use frozen ones, however yesterday I couldn’t find any in the shops so I had a go with tinned. They worked fine so I would say go with your preference – fresh, frozen or tinned. Obviously fresh are better but they also cost a fortune and you have to get the pips of them – I’m too lazy for this!
  • To prepare your loaf tin, I suggest greasing and flouring the tin as well as placing a long strip of greaseproof paper along the base, with overhangs at each end so the cake can be easily lifted out. 
Cherry Crumble Cake
Ingredients
For the Crumble Topping:
60g Plain Flour
25g Unsalted Butter  (chilled)
25g Caster Sugar
¼ tsp. Ground Cinnamon
20g Sliced Almonds

For the Cake:
190g Unsalted Butter (softened)
190g Caster Sugar
3 Eggs
200g Plain Flour
1tsp. Baking Powder
¼ tsp. Salt
½ tsp. Cinnamon
30ml Whole Milk
200g Pitted Cherries (roughly chopped)

1)      Preheat the oven to 170◦C, grease, flour and line your loaf tin. Begin by making your crumble. In a small bowl, rub together the butter and flour until the mixture resembles fine breadcrumbs. Stir in the caster sugar, ground cinnamon and sliced almonds. Place to one side.
2)      In a large bowl or freestanding mixer, cream together the butter and sugar until light and fluffy. Gradually, a little at a time, add the eggs to the creamed butter and sugar mixing well after each addition.
3)      In a separate bowl, sift together the flour, baking powder, salt and cinnamon. Gradually add this dry mix to the wet mixture in three stages, stirring well each time. After the second addition, add the milk and combine. Once the mixture is completely smooth, add half of the chopped cherries and stir to evenly distribute throughout. Pour into your prepared loaf tin and add the remaining cherries to the top of the mixture. Top these cherries with the crumble mixture and lightly press down with the back of a spoon. Bake in a preheated oven for 60mins or until a skewer inserted into the middle of the cake comes out clean.
4)      Leave to cool completely in the tin before removing and cutting into slices. Enjoy!


Friday, 15 June 2012

My Version of Rocky Road


I’ll admit, this week I haven’t been particularly original or exciting but I have been fun – what’s more fun than grabbing a load of confectionary and snacks, smothering them in chocolate and squishing them into bars of rocky road? I can tell you – not much. Although it’s not something that necessarily requires a recipe and most people probably have their own version, but here’s mine and it’s pretty delicious and Treat Friday worthy...in my opinion anyway!


This week has been fairly boring for me with this being my first day off work since last week’s Treat Friday. Adding to that I’ve spent the week attempting to be super healthy in order to try and detoxify my body from all the cake and trifle I had during the birthday celebrations last week. Now I’m heading away for the weekend though and I’ll probably eat and drink rubbish again and have to start the process all over again next week...fine!


Now onto the Rocky Road, I have to admit that it’s not something that I particularly have a great love for. I don’t dislike it, don’t get me wrong, but it’s not something I’d necessarily choose given a choice of cakes or bars. I’ve made it a couple of times though, the first time being by request for my younger sister when she finished her exams several years ago. This particular time, I followed a recipe from one of my favourite cook books and...it was a monster. Literally, this stuff had 2kg of chocolate in the recipe and that was just the tip of the iceberg. It was huge and sickly and of such scale that it looked like you could probably build a house with the brick sized portions. Anyway, lesson learned – any recipe that uses more confectionary than you’d otherwise eat in a year, should be generally avoided.


Consider my version the scaled-down, no industrial but still delicious version. Of course, feel free to substitute the additions I’ve made with your preferences but I’d suggest sticking with similar quantities.


No tips this week – look out next week for my dark chocolate and sour cherry loaf cake!

Rocky Road
Ingredients
200g Milk Chocolate (broken into small chunks)
200g Dark Chocolate (broken into small chunks)
1 tbsp. Golden Syrup
75g Mini Marshmallows
75g Digestive Biscuits (broken up)
75g Honeycomb
50g Salted Peanuts
200g White Chocolate (broken into small chunks)

9inch Square Cake Pan

1)      Line the cake pan with tin foil and lightly grease with butter. Melt together the golden syrup, milk and dark chocolate in a heatproof bowl over a saucepan of boiling water.
2)      While the chocolate and syrup is melting, combine the marshmallows, biscuits, honeycomb and salted peanuts together in a large bowl. When the chocolate and syrup are fully melted, pour over the dry ingredients and stir until evenly combined.
3)      Tip this into the prepared pan and press down until fairly even. Again in a heatproof bowl over a saucepan of boiling water, melt the white chocolate. Pour this melted white chocolate over the top of the rocky road. Leave or chill until fully set before slicing into bars.


Thursday, 7 June 2012

Cranberry and White Chocolate Cookies


Well, it’s been another busy and fun filled week in my life, made even better by the fact that it was my birthday on Wednesday! All very exciting, for obvious reasons, but made even more so by travelling home to my parents’ house to spend it there. It was only the second time I’ve visited since March so it was really fun to see all the family and finally get some baked goods that I didn’t bake myself! I broke with tradition this year and requested my sisters make me a birthday trifle rather than cake. I did this largely because I have cake reasonably frequently doing this blog and because I ultimately love trifle! And this wasn’t just some ordinary trifle, it was a raspberry and white chocolate trifle....three words; white chocolate custard. Yum. So that was delicious and I ate close to my own weight in it seeing as I think that’s what you’re supposed to do on your own birthday.


Now though I’m back home and back in the kitchen with some white chocolate and cranberry cookies. If I’m honest, with all the fun and games of the past week I had a moment of...’oh yeah, it’s Friday tomorrow’ and had no idea what to make. So I started flicking through my recipe books and came across several cookie recipes and a white chocolate and cranberry cookie recipe in particular. Up to this point, I’ve avoided using a cookie recipe for Treat Friday largely because it’s a bit boring and most people have a favourite cookie recipe they use anyway. Well obviously I’ve given in, but I’ve tried to make it a bit more fun with some cranberries thrown in rather than just plain old chocolate. I did want to put macadamia nuts in too to make them fancier, unfortunately the supermarket didn’t have any – how uncooperative!


These cookies are very nice regardless and also very easy. The quantities in this recipe made 25 smallish cookies for me but you can make them as large as you want to! So enjoy your treat Friday, I unfortunately won’t be partaking this week due to the vast quantities of treats (trifle) I’ve already had this week. Roll on next Friday!


Some final tips before you get started:
  • To keep these cookies nice and round, briefly roll each piece of dough into a ball before you place it on your baking sheet. They’ll cook down to an (almost) perfectly round shape.
  • Make sure each piece of cookie dough is a couple of inches away from those around it. This dough will spread and if not they’ll cook together, you’ll have to cut them apart and you end up with square cookies. The horror!
  • For me, 12 minutes is the perfect baking time when making the smallish versions of these cookies. The dough balls I made were about the size of a walnut and 12 minutes in the oven left them slightly crunchy on the outside but soft and chewy on the inside. If you prefer yours softer, I’d have a go at cooking them for 10 minutes. If you like them crunchier, I’d leave them in for 15 minutes – just make sure they don’t burn!


Cranberry and White Chocolate Cookies

Ingredients
140g Unsalted Butter (softened)
80g Caster Sugar
80g Soft Light Brown Sugar
1 Egg
½ tsp. Vanilla Extract
200g Plain Flour
½ tsp. Salt
¼ tsp. Ground Cinnamon
½ tsp. Bicarbonate of Soda
100g Dried Cranberries
100g White Chocolate Chips

2 x Baking Sheets

1)      Preheat the oven to 170◦C, line the baking sheets with greaseproof paper. In a large bowl, cream together the butter and both of the sugars until light and fluffy. Gradually add the egg and the vanilla extract, stirring between each addition until well combined.
2)      Sift the plain flour, salt, ground cinnamon and bicarbonate of soda into the bowl and stir until just combined. Add the dried cranberries and white chocolate chips, stir until evenly distributed.
3)      Take heaped teaspoons of dough and roll into balls, place onto the prepared baking sheets leaving a couple of inches between each ball of dough. Bake in the preheated oven for 12-15 minutes.
4)      When slightly golden brown, remove from the oven and leave to cool on the sheets. Enjoy!


Friday, 25 May 2012

Millionaires Shortbread


Following on from last week’s Bakewell Tart, today we’re going for another classic – Millionaires Shortbread. I can honestly say that never in my entire life have I ever met a person who does not love this overly indulgent excuse for a biscuit/bar/general baked good. Therefore you cannot go wrong if you choose to spend an hour of your Friday (other days are available) having a go at this recipe. Worst case scenario, everything goes wrong and you end up scooping melted chocolate, caramel and biscuit out of a cake tin...that’s my kind of worst case scenario.


Now to begin with these delicious little chaps, one thing that has always annoyed me about them is the name. Do you go for ‘Chocolate Caramel Shortbread’ or ‘Millionaires Shortbread’? Is the latter being snobby? Is the former insinuating that you are an idiot by having to name it with every ingredient involved? Who knows? I like Millionaires Shortbread anyway...it sounds jazzier.


Regardless, this is another of those great recipes which can be so incredibly simple but with exceptional results. I’m trying to be traditional here and am therefore making all of the layers separately and from scratch (minus the chocolate obviously...) It is however, a recipe that can be as complicated or easy as you want it to be. If for example, you wanted to go for quick, fast and delicious, you could make the shortbread layer using smashed up shortbread biscuits mixed with melted butter (as you would for a cheesecake base), the caramel using the excellent pre-made stuff and sticking some melted chocolate on top to finish it off. Job done.


That, or you can make it extra special, spend a little more time and follow this recipe. As I said, in terms of audience satisfaction, you can’t go wrong with this one. That is of course, if it makes it out of your kitchen and doesn’t mysteriously disappear in the mean time...what do you mean there’s chocolate all around my mouth?


Some Final Tips Before You Get Started:
  • I’ve used dark chocolate in my recipe whereas most recipes call for milk chocolate. I’ve done this just due to my personal taste in order to try and reduce some of the sickly sweetness which comes with Millionaires Shortbread. If you’re not a fan or you like that sweetness, by all means use milk chocolate instead.
  • When making your caramel, watch it and stir it constantly or else it will burn to the pan and you’ll end up having to sieve it onto your biscuit base. I of course, have never done this...maybe.
  • We’ve gone over the best way to melt chocolate many times in the past – using a bain marie or a heatproof bowl over a saucepan of boiling water. In this recipe I did this for the large quantity of dark chocolate, however with the 50g white chocolate, I put this in a heatproof ramekin and melted this in the microwave, just for speed and because it’s easier to wash a ramekin than a bowl (laziness). You have to be careful when doing this however as the chocolate can really easily burn. I avoid this by blasting in the microwave for only 10 seconds at a time and stirring it after every 10 seconds until the chocolate is melted. It’s quick and easy but just be careful.
Millionaires Shortbread

Ingredients

For the Biscuit Layer:
200g Plain Flour
150g Unsalted Butter (softened)
60g Caster Sugar

For the Caramel:
397g Tin of Sweetened Condensed Milk
100g Light Brown Sugar
100g Unsalted Butter
2 tbsp. Golden Syrup

For the Chocolate:
250g Dark Chocolate
50g White Chocolate

9inch Square Brownie Tin

1)      Preheat the oven to 180◦C, grease the base and sides of your cake tin and line the base with greaseproof paper. In a large bowl, combine together the plain flour and caster sugar. Cut the softened butter into cubes and add to the flour and caster sugar. Using the tips of your finger against your thumbs, rub the butter into the flour and sugar. This will initially look like a breadcrumb mixture but will come together into a dough.
2)      Tip the dough into your prepared tin and press it down firmly to evenly cover the base. Bake for approximately 25 minutes or until golden brown and firm. Remove and leave to cool.
3)      While the base is cooling, place the condensed milk, light brown sugar, unsalted butter and golden syrup into a non-stick saucepan. Place over a medium heat and stir continuously for 7-8 minutes until the butter has melted and the mixture has thickened and turned a golden caramel colour. Spread evenly over your biscuit base and leave to set and cool for at least 30 minutes.
4)      For the chocolate layer, melt the down both chocolates in separate bowls using either a bain marie or the microwave (if using the microwave, be careful not to let it burn). Once melted, pour the dark chocolate over the caramel and spread evenly. Using a spoon, drizzle lines of white chocolate vertically over the dark chocolate. Finally, using either the point of a knife or a skewer, drag it across the chocolate layer in horizontal lines to get that swirling/dripping effect. Leave the chocolate to set before cutting into small squares or larger bars. Enjoy!


Friday, 18 May 2012

Bakewell Tart


Bakewell tart day!! I’ll be honest, I’ve not been prepared this week and while I have written and made a recipe, I haven’t actually written a blog. I’ve therefore found myself in the great situation where I’ve just come off my second night shift, am so tired that I can barely string a sentence together and now have to write something coherent enough to be understood by the general population. Fun! 


So forgive me if it’s short and sweet today but I am currently the most incoherent human on Earth. This recipe is so quick, easy and delicious. It's perfect as a dessert or as an afternoon tea cake and I can guarantee will be loved by everyone...except maybe those with nut allergies. Anyway, bakewell tart is a classic for a reason, I certainly know that it went down well with my colleagues when I took it into work last night, so have a go! 


Bake, enjoy and have a great weekend! I'm off to curse at the yellow curtains in my bedroom that let in every inch of daylight and try to get some sleep.


Some final tips before you get started...
  • Some pastry making tips:
    • Handle as little as possible.
    • Be gentle when pressing into the (very well greased) tart tin. If you stretch the pastry it will shrink while baking...I speak from experience.
    • If your dough is too dry to come together, add a very small amount of ice cold water until it comes together. If your dough is too wet and sticky, add a little flour until it is smooth and easy to handle.
    • All of your pastry ingredients should be cold! Room temperature should never have anything to do with it!
    • To bake blind, line your uncooked pastry shell with greaseproof paper and fill with ceramic baking beads or an alternative which will weigh down the pastry but not burn in the oven. This will stop your pastry from rising.
  • While baking your bakewell tart, if the top looks as though is getting a little burnt but is still wobbly to touch, cover with kitchen foil in the oven and continue to bake for the designated time or until the centre has set. 
Bakewell Tart

For the Pastry:
200g Plain Flour
2 tbsp. Icing Sugar
Pinch of Salt
100g Unsalted Butter (chilled and cubed)
2 Medium Egg Yolks (beaten)
1 tbsp. Ice Cold Water

For the Filling:
100g Unsalted Butter (softened)
125g Caster Sugar
3 Large Eggs (beaten)
½ tsp. Almond Extract
1 tbsp. Grated Orange Zest
150g Ground Almonds
30g Flaked Almonds
6 tbsp. Raspberry Jam

20cm Round Tart Tin

1)      To make the pastry, sift the flour, icing sugar and salt into a large bowl. With the tips of your fingers, rub the chilled butter into the flour, sugar and salt until the mixture resembles bread crumbs. Stir in the eggs yolks until the mixture comes together to form a pastry dough. If the mixture still won’t come together, add one tablespoon of ice cold water a little at a time until a smooth, firm dough has formed. Flatten the dough into a disc, wrap in cling film and chill for 30 minutes.
2)      Grease the tart tin. Once the pastry has chilled for 30 minutes, on a floured surface roll out the pastry using a rolling pin until approximately 3mm thick. Line the prepared tart tin with the pastry, pressing it in gently to fit the mould. Chill for a further 30 minutes.
3)      Preheat the oven to 190◦C. Prick the base of the tart shell with a fork before lining with greaseproof paper. Fill the greaseproof paper with baking beads or an alternative before baking blind for 15 minutes.
4)      Remove the tart from the oven and remove the baking beads and greaseproof paper before baking the tart shell for a further 5 minutes until golden brown. Remove and reduce the oven to 180◦C.
5)      To make the filling, cream together the butter and sugar for at least 5 minutes until light and creamy. Gradually, a little at a time, stir in the eggs until well combined with the creamed mixture. Add the almond extract and orange zest before folding in the ground almonds.
6)      Spread the base of the tart shell with the jam until evenly covered. On top of this, fill the tart shell with the filling mixture, smooth and cover with the flaked almonds. Bake for 30-35 minutes until the tart is golden brown and has set in the middle. 


Friday, 11 May 2012

Chocolate Cheesecake Muffins


This week found me enjoying one of my frequent visits to Durham to see the boyfriend and as per usual we found ourselves visiting our favourite cafe. I’ll be honest, it’s not a great cafe but we’ve been going there since the very early days of our relationship and now it’s kind of a habit. Anyway, this week during our visit we shared a blueberry cheesecake muffin. That’s right; blueberries...cheesecake...and muffin. It was great! What more could you want? Oh wait, what? Chocolate? Ok then - chocolate cheesecake muffins.


When I first started coming up with the idea for this recipe (during our coffee date...a lot of our conversations end up being about cake), I was thinking about making a separate cheesecake mix and adding this to the muffins. And then I thought, that sounds like a lot of hassle, particularly when there is that great chocolate cream cheese that is essentially pre-made chocolate cheesecake that I could just use instead. I say chocolate Philadelphia is great and hopefully in this recipe it is, although I have to admit that to begin with I was very wary of it. It looked weird. Anyway, I then stayed at my sister’s house one day and she had a tub of it and a handy packet of digestive biscuits...so obviously I experimented and put them together and then I saw the light. Instant baby chocolate cheesecake. So yes, maybe chocolate cream cheese does seem a little weird when you first come across it but it’s ultimately chocolate cheesecake filling in a tub and therefore very useful, particularly in recipes like this one.


Now, the eagle eyed amongst you may feel like this recipe seems a little familiar and that may be because it’s essentially the same recipe I used for the dark chocolate and ginger muffins I made many moons ago. I’ve used the same recipe and adapted it ultimately because it’s a great basic muffin recipe that works – why mess with success?


In summary, I feel like cream cheese muffins are the way forward. Maybe they’ve been around for ages and I’m late to the party but they are my thing of the moment so if you’ve never tried one, have a go at this recipe! It’s really quick and easy and looks fancy enough with its magical combination of cheesecake and muffin that anyone you serve it to may be under the impression that you are a culinary wizard. Enjoy!!


Some final things before you get started:
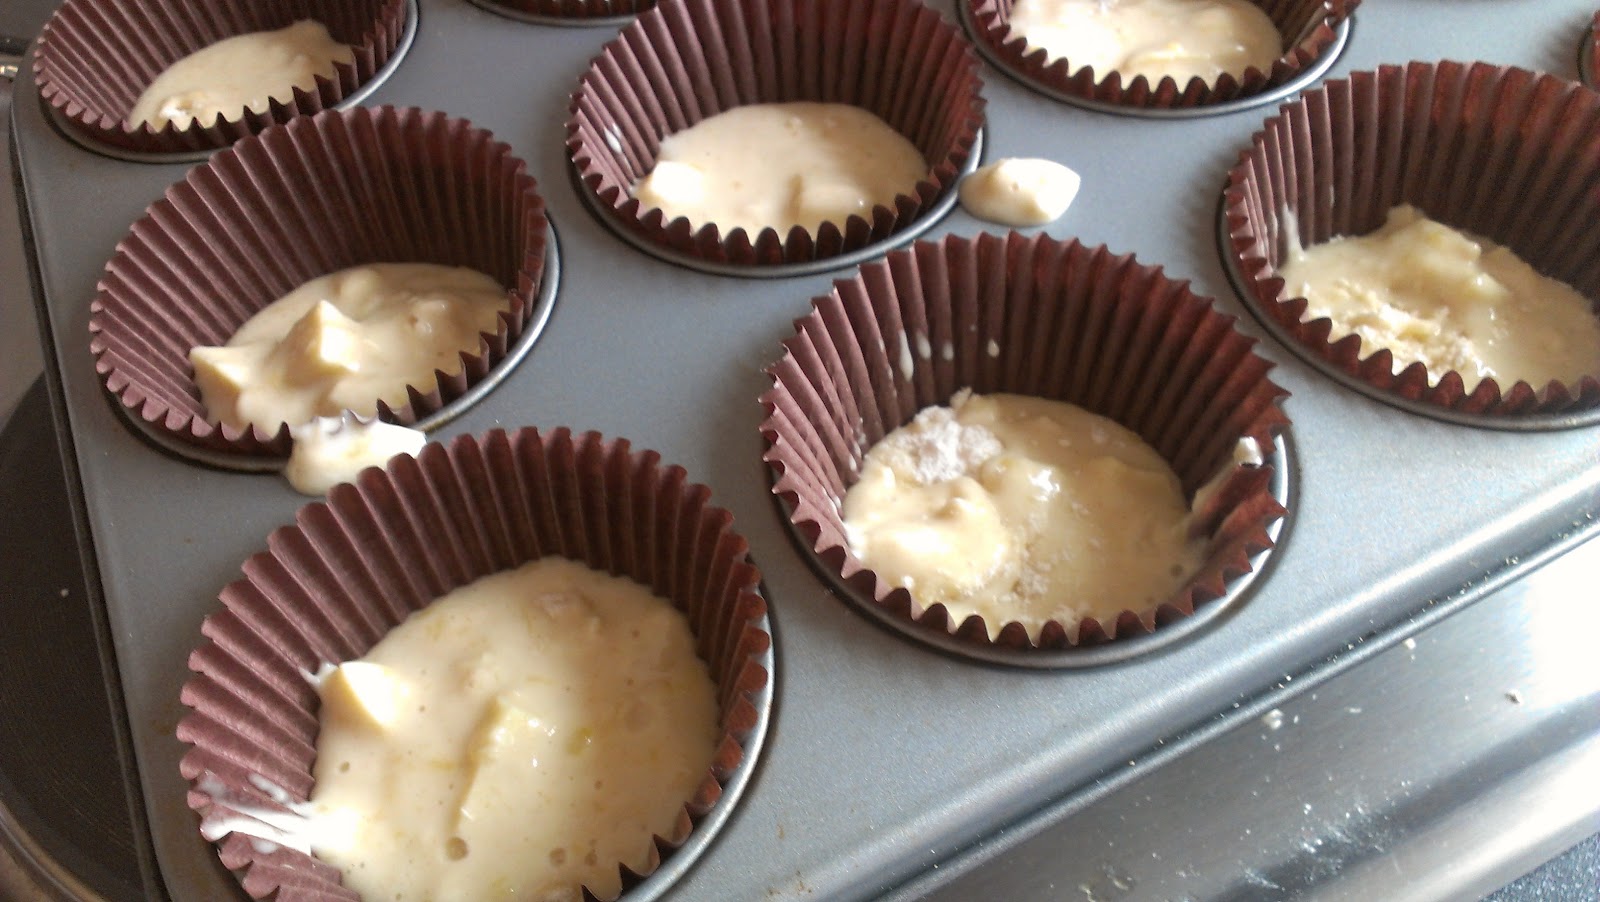
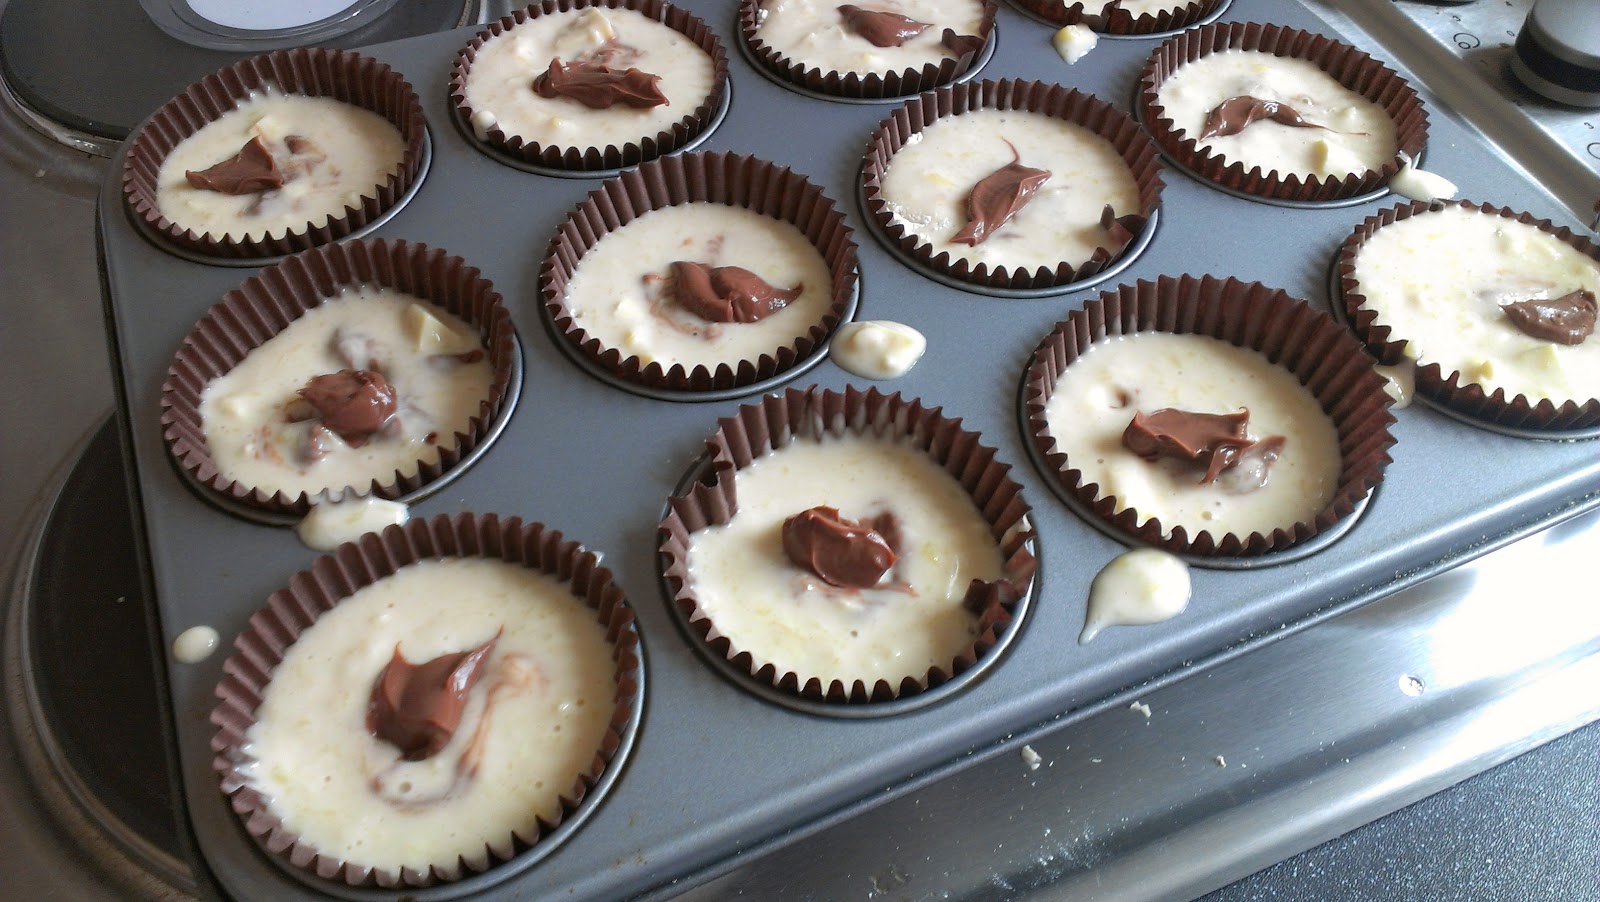
  • As with all and any muffin recipe, keep all mixing to a minimum. When I say stir until just combined, I mean it! As you can see from the pictures of my mixture, it’s pretty lumpy and horrible looking but that’s exactly what it should be like. Don’t try to make it smooth...don’t do it!
  • My trusty ice-cream scoop which I usually use to pour my batter into the muffin tins has been abandoned with this recipe because of the layering of the mix. This potentially means that your muffins are not all the same size and therefore as aesthetically pleasing but never mind! They’re delicious.
  • With this recipe, I’ve only used white chocolate chips and so the muffin batter itself does look a little anaemic but this is what it’s supposed to look like! If however, you’re insane and not a white chocolate fan, do use whichever chocolate you prefer.
  • Finally, please experiment with this idea and recipe! I’m only just starting to think about the combinations that you could come up with in the cheesecake muffin genre. Fruit and chocolate cream cheese? Maybe raspberries? Fruit and normal cream cheese filling? Have a play and use whatever ingredients you prefer! As I said, for this recipe I’ve used my basic go-to muffin recipe so if you do want to experiment, just stick with the basics and add the flavours of your choice!


 Chocolate Cheesecake Muffins

Makes 12

Ingredients
350g Plain Flour
Pinch of Salt
2 tsp. Baking Powder
½ tsp. Bicarbonate of Soda
160g Caster Sugar
70g Unsalted Butter (melted and cooled)
270ml. Buttermilk
200ml Whole Milk
1 Egg
½ tsp. Vanilla Extract
200g White Chocolate (roughly chopped)
150g Chocolate Cream Cheese (e.g. Cabury Chocolate Philadelphia)

12-Hole Muffin Tin

1)      Preheat the oven to 170◦C and line a 12-hole muffin tin with muffin cases. In a large bowl, sift together the flour, salt, baking powder and bicarbonate of soda. Add the caster sugar and stir together briefly.
2)      In a large jug, combine the melted butter, buttermilk, milk, egg and vanilla extract. Whisk together until combined.
3)      Add the wet ingredients to the bowl of dry ingredients and mix until just combined. The mixture should still be lumpy. Add the roughly chopped white chocolate to the batter and briefly stir until evenly distributed throughout.
4)      Fill each muffin case with 1 tbsp. of the muffin mixture. Onto this, place 1 tsp. of the chocolate cream cheese. Cover this with 1 tbsp. more of the muffin mixture and swirl together briefly with a skewer. Finally, top each muffin with ½ tsp. of the chocolate cream cheese and bake in the oven for 30 minutes until golden brown.
5)      I’m not going to say cool before serving...if you eat them still warm from the oven then I will not judge you! Enjoy!

Thursday, 3 May 2012

Mixed Berry Crunch Bars


Good morning/afternoon/evening! I hope everyone has had a great week, I’ve enjoyed a very lovely five days off and spent the weekend up in Durham and then the rest of the week finally getting to enjoy my new city of York on a weekday, minus the hoards of people who tend to flock to the city at the weekends. Of course, walking around town the week after payday did lead to two new pairs of shoes, a jumper, three tops, a new pair of trousers and four nail varnishes...oops. At least I managed to resist melting my debit card in any of the kitchenware shops, which has more to do with the lack of space in the kitchen than my willpower.


On to this week’s recipe and we’re back to my favourite ingredient of mixed berries. This time I’m putting them into crunchy bars which are part crumble, part cake, part fruity, jammy goodness. I know I’ve already done a mixed berry crumble tart which some might argue is very similar but allow me to argue that this is not the case. First of all, the tart had a pastry base, these bars have a cake base. Second, these bars have jam, the pastry did not and finally, the crumble/crunch topping is completely different. See?? I told you they weren’t the same.


On to the practicalities of this recipe, I’m going to admit that my attempt at these bars was not perfect although I think this is largely down to the fact that I couldn’t find my favourite baking tin. I therefore had to use a new, entirely foreign tin and potentially didn’t grease it enough. I also, even after living in this new house for 6 weeks, have yet to buy kitchen scissors (an absolute nightmare) and therefore my cutting and application of greaseproof paper is really hit and miss when it lines the tin. Ultimately this all led to me having a little trouble getting these bars out of the tin and eating a lot of the crumbly mess I made along the way which is never good! So the bottom line is - make sure that you grease and line your tin properly, don’t get sloppy like me...unless you like that ‘I just ate my own weight in cake crumbs’ feeling or serving hacked at (albeit delicious) mush to your friends.


As with a lot of my recipes, I give you permission to go out into the world and experiment. I used raspberries and blueberries for my version, however you may wish to try an alternative. I feel like apple could be really good (thinly sliced) or maybe even peaches. As I said, experiment and have fun with it!


Some Final Tips Before You Get Started...
  • When you’ve made the batter for the base of the bars, you’ll think ‘really, is this actually going to cover this tin?’ I had exactly the same reservations but I promise that it does
  • The crumble topping mixture for the bars is fairly wet for a crumble mix. It’s really all in the application as you’ll need to get your hands in there and almost sprinkle it around the fruit and jam until it’s evenly distributed. You might also want to give it a gentle pat down into the fruit and jam so that it all combines firmly and doesn’t fall apart later on when you’re dividing it into bars
Mixed Berry Crunch Bars

Ingredients
135g Unsalted Butter (softened)
200g Caster Sugar
1 tsp. Vanilla Extract
1 Large Egg
130g Plain Flour
60g Self Raising Flour
240g Raspberry Jam
100g Raspberries
100g Blueberries

For the Crumble
120g Plain Flour
4 tbsp. Light Brown Sugar
80g Walnuts (finely chopped)
110g Butter (melted)

20cm x 30cm Baking Tin

1)      Preheat the oven to 180◦C, grease and line the tin with greaseproof paper. For the base of the bars, cream together the butter, vanilla extract and caster sugar until light and fluffy. Gradually beat in the egg until combined.
2)      Sift both the plain flour and self-raising flour into the creamed mixture and fold in gently. Spread this batter evenly into the base of the greased and lined tin and bake for 15 minutes.
3)      While the base is baking, begin to gently heat the jam over a low heat. In a separate bowl begin to make the crumble topping by gently combining the flour, light brown sugar and chopped walnuts. Finally, stir in the melted butter until a soft but wet mixture has formed.
4)      When the 15 minutes are over, remove the base from the oven. Spread the warm jam over the base until fully covered before scattering over the fresh raspberries and blueberries. Finally, sprinkle the crumble mixture over the fruit and press down gently to into the fruit and jam.
5)      Bake for a further 20 minutes until the crumble topping is golden and crunchy. Cool completely before dividing into bars or squares.