Because A Friday Treat is the Perfect Way to End the Week!

Saturday, 28 January 2012

Treat Saturday? Lemon Viennese Whirls


I know, I know. I’m late. This week we’re obviously having a Treat Saturday rather than a Treat Friday and just this once, I think that’s ok. It is, I promise.

I’ve basically been feeling really ill all week with a sore throat and ear ache and was in so much pain! Finally booked a doctor’s appointment for Friday and then of course woke up and felt completely fine. So annoying. It did mean however, that I could finally motivate myself to get off the sofa and bake something!


This week then it’s Lemon Viennese Whirls and they are, if I do say so myself, delicious. My mother even said they’re one of the best things I’ve made for Treat Friday, which is a bold statement indeed! I have to admit, when I made them and took the photographs for this blog, I made a few mistakes and just didn’t have time to remake the recipe to rectify them. More than anything, I made my biscuits far too big! The original recipe from which I adapted these states that it will make 32 separate biscuits – 16 completed Viennese Whirls. Well, because I made my biscuits so big I only managed to make 12 separate biscuits – 6 completed Viennese Whirls. To be honest, they’re delicious but so huge they can be classified as monsters. So just try to control yourselves a little more than I did with the piping bag, don’t get carried away!


Some Final Tips Before You Get Started:
  • Your mixture needs to be fairly loose and wet, if it’s too stiff it’ll be really difficult to pipe (I speak from experience). Make sure your butter is really, really soft and that the batter is really well mixed.
  • Line your baking sheets with greaseproof paper and find some sort of circular stencil i.e. a glass or biscuit cutter that has around a 5cm diameter. Using this, draw circles on your greaseproof paper to give yourself guidelines for when you’re piping out your biscuits. This not only makes it easier but also means that your biscuits will be a uniform size(ish) for when you sandwich them together
  • Speaking from experience again, handle your cooked biscuits very gently. They crack and break very easily!
  • I’m not going to specify how many biscuits this recipe makes as obviously it depends on the size of your biscuits. Just try to make an even number for sandwiching!
  • This is a great recipe in that once finished, they look really fancy but in fact, are incredibly easy to make so don’t be put off by their appearance! 

Lemon Viennese Whirls

Ingredients

For the Biscuits:
250g Unsalted Butter, softened
50g Icing Sugar
250g Plain Flour
50g Cornflour
½ tsp. Vanilla Extract
1 tbsp. Grated Lemon Zest
1 tsp. Fresh Lemon Juice

For the Filling:
100g Unsalted Butter, softened
200g Icing Sugar
1 tbsp. Whole Milk
Drop of Vanilla Extract
75g Lemon Curd

2 Baking Sheets
Piping Bag with Star-Shaped Nozzle

1)      Preheat the oven to 190◦C. For the biscuits, in a blender mix together the unsalted butter, icing sugar, plain flour, cornflour, vanilla extract, grated lemon zest and lemon juice. Blend until well combined and soft.
2)      Line your baking sheets with greaseproof paper and stencil on your circle guidelines. Place the biscuit mixture into the piping bag with a star-shape nozzle and pipe in rounds onto the baking sheet. Bake for 13-15 minutes until slightly golden brown. Once baked, leave to cool on the baking sheets.
3)      While the biscuits are cooling, whisk together the butter and icing sugar for the butter cream. When just combined, whisk in the whole milk and vanilla extract until smooth and fluffy.
4)      Once the biscuits have cooled, cover the flat bases of half the biscuits generously with butter cream. Spread the flat bases of the remaining biscuits with around a teaspoon of lemon curd before sandwiching together with the butter-creamed biscuits. Enjoy, they’re delicious!

Friday, 20 January 2012

Mixed Berry Crumble Tart


Hello all! This week I’ve decided to make an actual, real-life dessert rather than cakes or biscuits that one tends to graze upon without discrimination throughout the day. This tart will officially have a place at my dining table this evening and will be thoroughly enjoyed (take note, family) following dinner.


Now when it comes to desserts and puddings, fruit crumble is definitely in my top five...maybe even top three! While at school we used to have fruit crumble served pretty much every day and it took an almost Herculean effort on my part to resist indulging as often as I could. Even though I love it, it’s not particularly something I make regularly. It’s one of those dishes which for me, has to be made in the winter. After all, when it’s freezing outside, there’s nothing better than a delicious warm dessert to warm you up inside. 


Just writing a recipe for fruit crumble however, would not be anything particularly spectacular and when I decide to treat myself on a Friday, it must be spectacular. What I decided to do therefore to jazz it up a bit, was to throw some pastry into the equation, creating what is essentially a fruit crumble tart. So you basically end up with this great dessert which is delicious served warm with custard (or cream if that’s the sort of thing you like...although why you’d EVER choose cream over custard is beyond me) AND will keep really well in the fridge for a cold slice of greatness the next day at breakfast or lunch (it’s up to you as I have no actual control over you).


You will at this point, no doubt have noticed that I’m specifically making my tart as a mixed berry crumble tart. This is only really because this is my absolute favourite crumble. I’m not a huge fan of apples in crumble and definitely not of pears but any sort of berry is great. For this particular recipe, it’s really handy to buy one of those packs of frozen mixed berries. For one its cheaper than buying several extortionately priced punnets of fruit and it also gives you access to fruits which are not necessarily in season. I left mine to defrost a little before I put them in my pie but I have made crumble before where I’ve just thrown them in frozen. And on that note...

Some final tips before you get started:
  • Returning the pastry to the fridge again and again may seem tedious but it’s necessary. As I’m sure you know, the colder the pastry (or more specifically the butter in the pastry) the flakier and more delicious your pastry will be. That’s why it’s key to only mix your pastry to the point where some pea sized lumps of butter remain.
  • Don’t try and mix the crumble with a spoon, getting your hands in there and rubbing it together to form breadcrumbs is the only way. If you’re not sure how to do this, pick up a small quantity of the butter and flour and rubbing it with your thumb against your other four fingers, let it fall back into the bowl.
  • As with last week’s biscuits, when rolling out your pastry dough use plenty of flour on the work surface to prevent it from sticking. Just make sure you brush off any excess flour before you put in the tin for baking.
  • The easiest way I find to get my pastry into the dish without tearing holes in it is to fold it in half from bottom to top. I then fold this from left to right so I’m essentially left with my pastry in a quarter segment. This is easy to pick up and then unfold in your tart tin.
  • Be very gentle shaping the pastry into your tin. I speak from experience in saying that stretching the pastry to fit only leads to bad things.
  • Finally, when cooking both the pastry by itself and when the tart is fully assembled, place in the oven on a preheated baking tray. This helps the base of the pastry to cook evenly.


Mixed Berry Crumble Tart
 
For the Pastry (adapted from Hummingbird Bakery Cake Days):
110g Unsalted Butter (chilled and cubed)
225g Plain Flour
80g Caster Sugar
1 Large Egg
1tbsp. Ice Water

For the Filling:
400g Mixed Berries
75g Demerara Sugar
1tbsp. Plain Flour
½ tsp. Ground Cinnamon

For the Crumble:
140g Plain Flour
90g Unsalted Butter (softened to room temperature)
75g Caster Sugar
25g Rolled Oats
25g Chopped Mixed Nuts

23cm Tart or Flan Tin

1)      In a food mixer or processor, mix together the chilled and cubed butter to the point where some small, pea-sized lumps of butter remain. Stir in the sugar before adding the egg and ice water. Stir again until combined before bringing together into a lump of dough with your hands. Flatten into a disc and chill in the fridge for 20-30 minutes.
2)      Once chilled, roll onto a generously floured surface until around 5mm thick and large enough to line your tart tin. Dust off any excess flour and transfer to the tart dish (see method above). Gently push the dough to line the base and sides of the dish. Trim the edges of the tin with a sharp knife to remove any excess pastry and prick several holes in the base of the pastry.
3)      Return the dish to the fridge to chill for a further 30 minutes, preheat your oven and baking tray to 150◦C.
4)      Again once chilled, remove from the fridge, line the pastry with greaseproof paper and fill with baking beads before placing on the baking sheet in the oven to blind bake for 10 minutes. Following this, carefully remove the beads and paper before baking again for a further 10 minutes. Remove from the oven and leave to chill while making the filling. Turn the oven temperature up to 180◦C.
5)      In a medium sized bowl, combine the mixed berries, demerara sugar, flour and ground cinnamon.
6)      In a separate bowl, rub together the flour and butter until the mixture resembles fine breadcrumbs. Gently stir in the caster sugar, oats and chopped mixed nuts.
7)      Taking the pastry base, fill with the berry mixture before covering completely with the crumble. Bake in the oven for 30-35 minutes until golden brown. Leave to cool slightly before serving.


Friday, 13 January 2012

Chocolate Orange Shortbread

This week we’re entering the vast and varied world of biscuits. While they may not be the most difficult thing in the world to bake, everyone loves a biscuit of some kind or other. Personally I’m really partial to an oat and raisin cookie, a custard cream, a digestive and possibly my favourite, shortbread.


I have searched and searched for the perfect shortbread recipe, at one point last year I was trying a new one every few days. Some were too sweet, some were too savoury, some fell to pieces while rolling and others lost all shape when cooking to turn into puddles or shortbreadyness. It’s really annoying considering half of my family are Scottish and I have yet to receive any form of traditional family recipe that’s been handed down through the generations! The recipe I eventually found, from which this recipe has been adapted, was one I used last Valentine’s Day to make shortbread hearts (awwww) and actually turned out ok! I’m still not 100% sure it’s the perfect recipe but it’s still really good both by itself and with chocolate orange.


As far as the difficulty level of this recipe goes, it’s fairly simple. The only slightly annoying part is having to chill the dough which obviously is not difficult, it just means you have to wait an extra 30 minutes to get the sweet, delicious smell of baking cookies wafting through your house. 


Some final tips before you get started:

  • If you have an electric standing mixture, using it will make this recipe come together much faster. I usually would but like to do everything by hand for this blog, just so I cater for everyone!
  • As I said before, this recipe is very much straight-forward and easy. The only tip I can really think to give is about rolling your dough after it’s been chilled. I got this tip from a pastry tutorial I read on Smitten Kitchen, one of my favourite food blogs. It basically just involves going crazy with the flour you use to prevent your dough from sticking to your surface. Use as much flour as you need to stop the dough from sticking and just brush off any excess flour before cooking. It sounds obviously simple but that’s probably what makes it a great tip. You’ll never be stuck scraping dough off your work surface again!


Chocolate Orange Shortbread

Ingredients
175g Unsalted Butter (Room Temperature)
100g Caster Sugar
½ tsp. Vanilla Extract
1 tbsp. Grated Orange Zest
260g Plain Flour
Pinch of Salt
150g Dark Chocolate

Makes 20 (although this will vary, depending on your cookie cutter)

1)      In a large bowl, cream together the butter and unsalted butter until just combined. To this mixture add the vanilla extract and grated orange zest and stir.
2)      Into this bowl, sift in the flour and salt and stir until the dough starts to come together. Use your hands to bring the dough into a ball, and flatten into a disc.
3)      Wrap this disc in cling film and chill in the fridge for 30 minutes. At this point, preheat the oven to 180◦C. Once chilled, roll out the dough on a floured surface until around 1cm thick.
4)      Using your cookie cutter of choice, cut out your biscuits and place on an ungreased baking sheet before sprinkling with caster sugar. Bake in the preheated oven for 18 minutes or until slightly golden brown before removing to cool completely.
5)      While cooling, melt the dark chocolate in a heatproof bowl resting over a saucepan of simmering water. Once the biscuits are cool, dip into the melted chocolate horizontally so half is covered in chocolate. Place on a cooling rack and leave for the chocolate to set completely.

Thursday, 5 January 2012

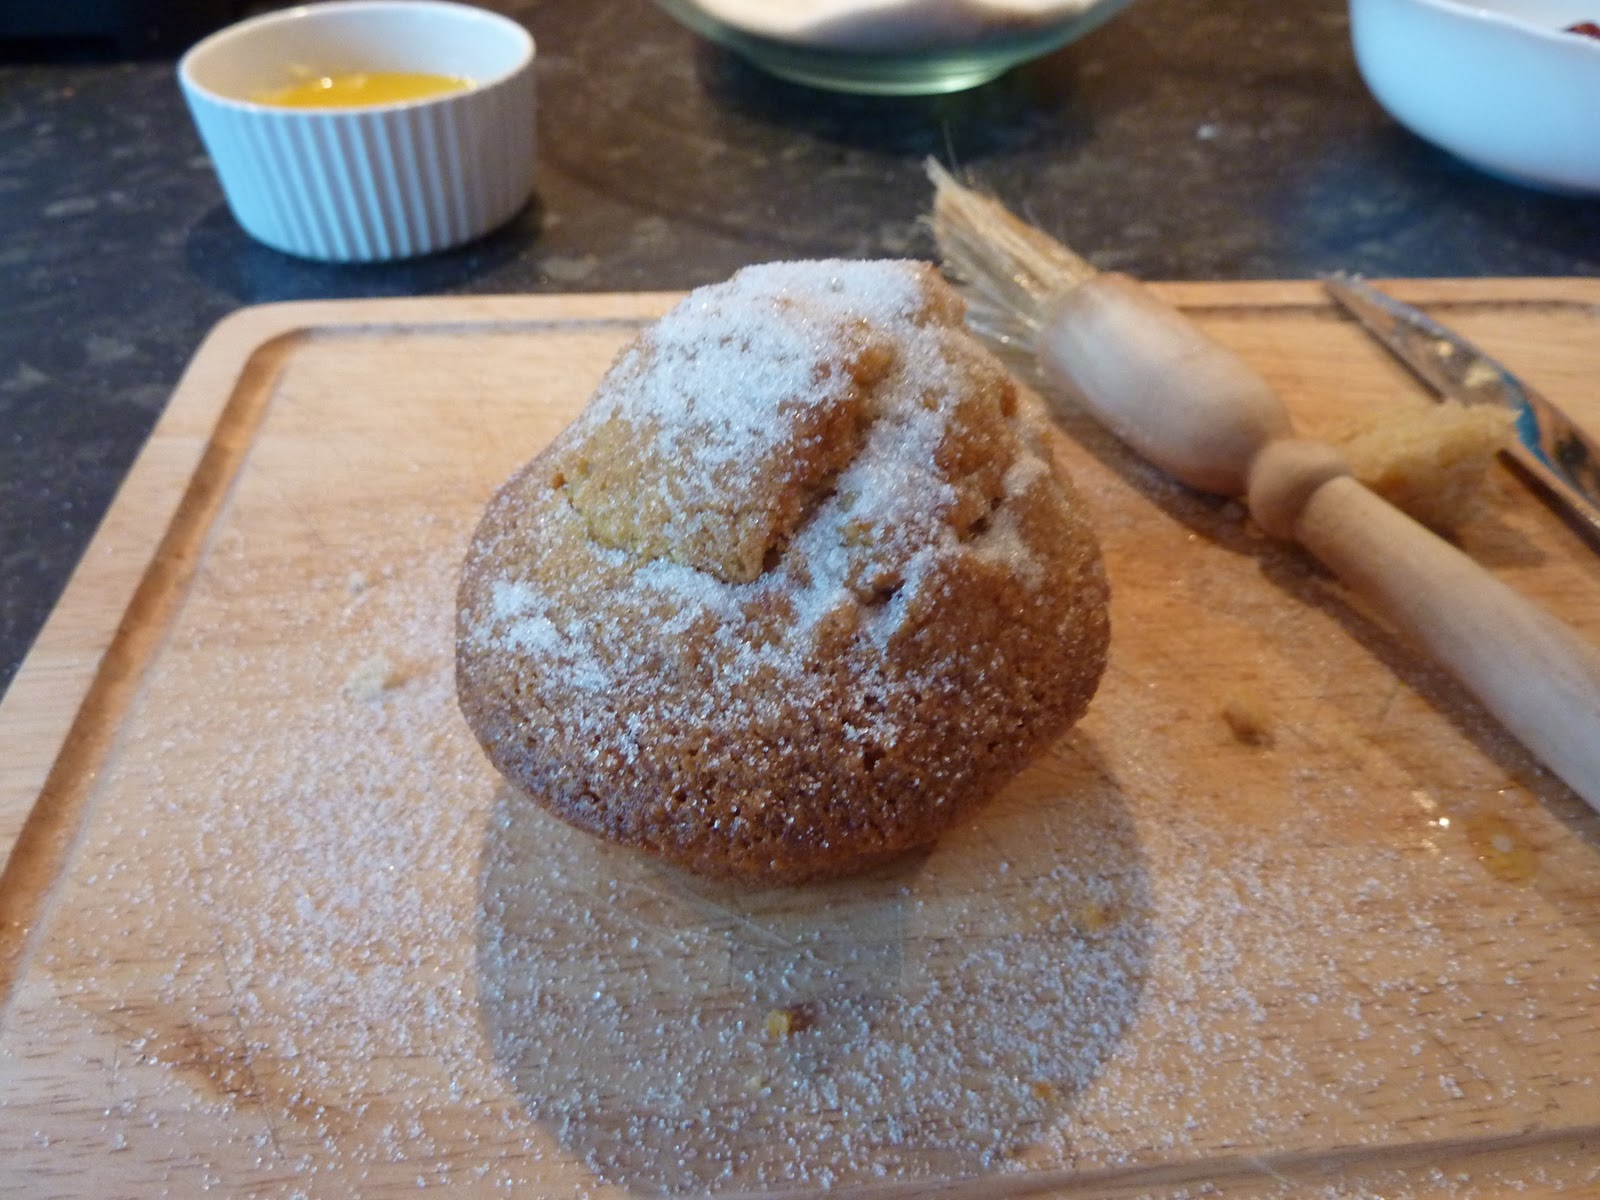
Jam Doughnut Muffins


Just what is the correct spelling? Doughnut? Donut? Wikipedia says both but I’m going with doughnut, it just looks better (and let’s just ignore the fact that I went to Wikipedia for this question rather than, say, a dictionary). Anyway, happy new year to all! I hope everyone has enjoyed the first week of 2012, I for one have largely spent it huddled indoors hiding from the weather. Although on Wednesday I did go for the first bike ride since I broke my foot in November, which was very exciting. I cycled 16km, got home, felt great...and then realised I couldn’t lift my legs high enough to climb the stairs. Don’t worry, the numbness was soon replaced by pain!


So here we are with the first Treat Friday of 2012 and I’ve gone with Jam Doughnut Muffins. Why muffins rather than just plain old doughnuts? Ultimately because any sort of baking that involves a deep fat fryer just seems unnecessary to me. Most baked goods are full of fats and sugar, do you really need to deep fry them too? I realise that there will be many saying “yes, of course you do!” but I have to disagree in this case, these muffins are excellent all by themselves – without being deep fried.


The original recipe from which I adapted my own was just for doughnut muffins, no jam included. As you may have realised by now however, I love adding some sort of fruit substance to a lot of my baking because a) I really like fruit and b) I think it really cuts through the sweet richness of cakes and biscuits perfectly. If jam isn’t your favourite in the world then, by all means, leave it out. As per usual you are not only allowed but encouraged to adapt this recipe to your own tastes.

Now I know that to look at, this recipe seems fairly long and complicated but I promise you it’s not when you put it into practice! The steps themselves are all really simple and it’s completely worth it. To look to my younger sister for a review, upon eating her first muffin she eloquently said: “Hmmmm...*head nodding*...mmmm...*more head nodding*...mmmmmm” Obviously there are just not the words. 


Some final tips before you get started:
  • Try and use fresh nutmeg that you grind or grate yourself! It has so much more flavour than the pre-ground stuff (although if this is all you can get hold of, that’s fine)
  • As with all muffins, only stir until just combined. No-one likes a tough muffin.
  • I’ve abandoned muffin cases for this so just make sure that your muffin tin is really well greased.
  • Don’t be afraid to go crazy with the amount of cinnamon sugar you decorate with. It’s this that really adds that doughnutty flavour.
  • Try not to go mad with the jam filling! I promise that a small teaspoons worth is enough, no-one wants it squidging all over the place!
  • Make sure the filling and topping are added almost as soon as the muffins are out of the oven and can be handled without burning your fingers.
Jam Doughnut Muffins
Ingredients
For Muffins:
175g Butter (Softened to room temperature)
200g Caster Sugar
2 Eggs
350g Plain Flour
1 tsp. Baking Powder
1 tsp. Bicarbonate of Soda
Pinch of Salt
½ tsp. Freshly Grated Nutmeg
½ tsp. Ground Cinnamon
250ml. Whole Milk
1 tsp. Vanilla Extract

For the Topping:
4 tbsp. Butter (Melted)
100g Caster Sugar
1 tsp. Gound Cinnamon
150g Raspberry Jam

1)      Preheat oven to 180◦C, lightly grease a 12-hole muffin pan.
2)      Cream together the softened butter and caster sugar until light and fluffy. Slowly add the eggs and mix, a little at a time.
3)      In a separate bowl, sift together the flour, baking powder, bicarbonate of soda, salt, nutmeg and cinnamon. In another bowl, mix together the milk and vanilla extract.
4)      Add half of the dry ingredients to the creamed butter, sugar and egg mixture. Stir until just combined before adding half of the milk mixture, stir and repeat with the rest of the dry ingredients and milk.
5)      Spoon the mixture into the muffin tin until each hole is around 2/3 full.
6)      Bake in a preheated oven for 20 minutes or until golden brown.
7)      While the muffins are baking, melt the butter for the topping and in a separate bowl combine the sugar and cinnamon.
8)      When the muffins are cooked and still warm, take each one and using a knife, cut out a round piece of cake to make a hole in the top of the cake.
9)      In the hole, place 1 tsp. of jam before replacing the cut out piece of cake. You may have to slice a bit of cake off the bottom of the removed piece of cake before you do this to make room for the jam.
10)   When replaced, brush the top of the muffin with melted sugar and generously sprinkle with the cinnamon sugar mixture. Enjoy!


Friday, 30 December 2011

White Chocolate and Raspberry Flapjacks

So this week, all has gone well and unlike last week I’ve actually managed to write a recipe! It’s been a busy week, obviously with all that eating and drinking and generally having a good time but I’ve pulled through.

I hope everyone has had a lovely Christmas, I for one had a great time. Christmas day itself involved getting up very early to open presents (I know. I’m 22 and still can’t sleep on Christmas morning . Ridiculous) and then giving over the next 24 hours to fun, family and food and wasn’t the amount of food ridiculous!? I know in our house we had Christmas pudding, trifle, Christmas cake and a cheese board for dessert alone (although we’re not really massive pigs, it’s just the one time of year when all tastes are catered for). Needless to say I still feel full!


One thing I have particularly overindulged in throughout the past week has been chocolate so I decided to avoid a chocolate-heavy recipe for this week’s Treat Friday. Don’t get me wrong, it still has chocolate in it (rude not to really) but as only a minor flavour in the overall recipe. I had thought of maybe coming up with some sort of light, healthy treat this week to counter balance previous indulgences but seeing as we haven’t reached New Year’s Eve yet there probably wasn’t much point!


White chocolate and raspberry flapjacks it is then. This recipe, like most of my others, is open to interpretation. If raspberries or white chocolate aren’t your thing, leave them out and substitute with your preference, sticking roughly to the quantity guidelines. One of my other favourites with these are blueberries but of course you can always leave any additions out and just have the plain flapjacks, they’re still delicious! This recipe is also great because it’s pretty much a one pot wonder – well two if you include the cake tin – and this is perfect for me as I really hate washing up. 


So have a go with this recipe and be creative with it. There aren’t many people who don’t like flapjacks so these will be perfect to serve to anyone who might be visiting you over the new year, I for one will be taking some with me as a gift when I head out later today to spend New Year’s Eve in North Yorkshire! At this point, it only remains for me to wish everyone a HAPPY NEW YEAR!!! I’ll be back this time next week – new year, new recipe!


Some final tips before you get started:
  • Well...these don’t really require and tips. They’re really straight forward! Have fun and enjoy!


White Chocolate and Raspberry Flapjacks
170g Butter
60g Light Brown Sugar
200g Golden Syrup
1tsp. Ground Cinnamon
300g Rolled Oats
100g Raspberries
75g White Chocolate, roughly chopped(plus 10g extra for decoration)

20cm Square Cake Tin

1)      Preheat oven to 180◦C, grease and line the base of a 20cm square cake tin.
2)      In one saucepan, melt the butter, sugar, syrup and cinnamon and heat until simmering. Leave to simmer for two minutes before removing from the heat.
3)      Stir in the oats until well combined before carefully folding in the raspberries. Finally stir in the white chocolate (it will melt a bit but this is completely fine).
4)      Pour and press gently into the prepared tin and bake for 25 minutes until golden.
5)      Once cool, melt the remaining 10g of white chocolate and drizzle over the flapjacks to decorate.  Leave to cool before slicing into small squares.

Makes 20 

Friday, 23 December 2011

MERRY CHRISTMAS!!

This week I’ve been very naughty. I’ve basically spent nearly all my time in the kitchen with my nose in a recipe book, preparing for the big day. I’ve baked, I’ve cooked, I’ve shopped and finally things are starting to come together. Unfortunately though, I’ve been unable to pull my brain out of recipe books for long enough to write a new recipe of my own so there’ll be no new treats today!

Let’s be honest though, do we really need a Treat Friday when we all know we’ll be eating our weight in food this weekend?  I for one will be saving myself for a weekend of pure indulgence, adding Treat Friday onto that would just be greedy!

To prove that I have in fact been doing as I say, I’ve included some photos of what I’ve been up to and maybe they’ll even give you a little inspiration for your own Christmas treats!

To begin, we have the centrepiece of any Christmas baking – it’s the Christmas cake.


Ordinarily, I make a Yule log as an alternative for those who don’t like Christmas Pudding (aka mad people) on Christmas day. This year however, I decided it was time to attempt a Christmas cake. So there I was at the beginning of November, spending a fortune on dry fruits and brandy and getting everyone in the house (potentially even the dog) drunk on the alcohol fumes as I cooked. Every week I unwrapped the fruity little bundle to feed with brandy and finally today I got to decorate it! I used the Nigella Christmas (the only book you'll need for Christmas) recipe and it seems to have turned out perfectly. Well...it has yet to be tasted but it looks great!

I had planned to decorate it with star shapes cut out of white icing. Unfortunately however I couldn’t find my cookie cutter and didn’t have the patience to leave it until I’d gone to the shops to purchase another. So I improvised, making a quilted pattern in the top and side with the back of a knife and a ruler, studding the edges with silver balls which have since rolled all over the kitchen. And of course, the Christmas tree cutter got involved as you can see.

It’s probable not traditional but I think it’s pretty!

I’ve also made red-velvet whoopie pies from the HummingbirdBakery Cake Days recipe book (which I LOVE). My mother has been pestering me to make these for weeks so I thought I’d treat her, seeing as its Christmas and all! From the same book came some white chocolate fudge cookies which I may adapt for another week’s Treat Friday as they were delicious!


Then I had to make something for my older sister, who was inconveniently born on the 22nd and therefore needed a birthday cake! I chose to again use the Hummingbird Bakery Cake Days book, combining the recipe for red velvet cupcakes with an icing from candy-cane cupcakes.


Getting this effect with the icing, I have to admit, was a pain. It involved dividing the icing into two, colouring one red and then squeezing both in side by side into the piping bag. It was messy work but I think the overall effect was worth it! And yes, that it glitter but I should point out it’s edible glitter from the cake shop – don’t go poisoning yourselves with the craft stuff!

So finally, I just want to wish everyone an amazing Christmas! I’ll be back next week with a brand new recipe, I promise. For the moment though eat , drink and fill yourselves with as many treats as you possibly can – that’s what I’ll be doing! 


(I just wanted to include this. My younger sister has been making it for the past three days and it has turned out fabulously – MERRY CHRISTMAS!!)

Friday, 16 December 2011

Rocky Road Chocolate Tart

Over the past two weeks, I’ve travelled a lot. I’ve travelled north to Durham and to York (twice) and today I’ll be heading to Bath for the morning and then to London this afternoon. Basically, I’ve been busy, so for this week’s recipe I’ve decided to develop an old favourite of mine for this perfectly comforting treat!


I started making this chocolate tart a couple of years ago when I went looking for a cheesecake-like recipe which didn’t contain any cheese (I have a sister who hates the stuff) and that didn’t involve the usual faff of tarts and cheesecakes with their blind-baking and water-bathing ways (and if you don’t understand what these things are then I think my point is clear!) A cheesecake-base and a non-bake filling seemed like the perfect combination for a simple, quick and easy dessert that everyone, and I mean everyone, would love. And love it they did.

The original recipe came from the BBC Good Food website and while this was excellent, over the past year or so I’ve altered it each time this tart has been made to suit my personal taste and to get what I think is the best result. For example, the original recipe called for all 200g of the chocolate to be 70% cocoa solids dark chocolate. While I know that the higher the cocoa percentage, the more fashionable it is to chocolate lovers, this just isn’t to my taste. I decided therefore, to try using only half this amount of dark chocolate and to pair it with 100g of milk chocolate instead. The result was heavenly – not too bitter, not too sweet.


So, as I’ve already said, I’ve made this tart numerous times and it has always been deemed a success. What then, was the next step for it? Well, while sitting on the train home from one of my long journeys north, I was musing upon this week’s recipe and called upon my long-suffering and often force-fed boyfriend for inspiration. He then proceeded to suggest some of my past creations, including a particular disaster which involved a lot of caramel and marshmallows stuck to the bottom of a cake tin. Knowing I had half a packet of marshmallows sitting in the cupboard at home, this got me thinking as did the mention of one of his particular favourites – the chocolate tart. Now correct me if I’m wrong but when it comes down to the word association of chocolate and marshallows, the next thing to spring to mind is surely rocky road? And didn’t a rocky road chocolate tart just sound amazing??


Now, having actually made this divine creation I have to tell you; it is a monster. Literally, it is a beast of a dessert and is not for the faint-hearted...or those with high cholesterol or a family history of heart conditions. It’s gooey, and sickly and definitely not pretty.


Still gorgeous though. If you love chocolate, rocky road and sickly sweet desserts then this is the one for you! It also struck me as a great recipe for this time of year when we all know we’re going to receive more boxes of biscuits and chocolates than can ever be eaten by a normal human. I’ve given some suggestions for the ‘rubble’ but feel free to substitute this for whatever you’ve got to hand. Bash it up and chuck it in this recipe, it doesn’t matter what you use. As long as it has texture and is delicious then it’ll work perfectly.

Some final tips before you get started:
  • If you don’t mind the extra washing up, use a blender to make the crumbs for your base and to chop up the rocky road.
  • On the other hand, if you’ve had a really bad day and need to take it out on something, take a rolling pin and just get smashing those ingredients.
  • Use an electric whisk to beat the cream if possible, it’ll save you both time and effort.
  • If you can’t get hold of butter biscuits for the base, just use digestives. Can’t go wrong.
Rocky Road Chocolate Tart

Ingredients (Chocolate Tart)
250g Butter Biscuits
75g Butter
1 tbsp. Golden Syrup
100g Dark Chocolate
100g Milk Chocolate
1 tsp. Vanilla Extract
2 tbsp. Icing Sugar
200ml Whipping Cream

For the Rocky Road
50g Chocolate Covered Honeycomb
75g White Chocolate Buttons
50g Malteasers
100g Chocolate Caramel Biscuits
50g Marshmallows

20cm Square Cake Tin or Equivalent

1)      Place the butter biscuits into a blender and blend until they look like breadcrumbs. Melt the butter and golden syrup together over a low heat and mix with crushed biscuits. Press crumb mixture into the base of the tin and place in the fridge to chill.
2)      Break the chocolate into small pieces and melt in a bowl over a bowl of simmering water. When completely melted, stir in the vanilla extract and icing sugar. Leave to cool slightly.
3)      In a separate bowl, whisk the whipping cream until it holds its shape. Fold in the chocolate mixture gently until smooth and combined.
4)      Place your rocky road rubble ingredients into the blender and pulse briefly until roughly chopped.
5)      Gently stir the rubble into the combined chocolate and cream until evenly distributed. Pour this mixture onto the chilled base and chill again for at least 1 hour.
6)      When firmly set, slice into bars to serve.

Serves 9